
At my last job, we had a “Breakfast Club” where everyone would take turns bringing in breakfast on Fridays. This was fun, because everyone had different favorites and brought in whatever they liked. Some did homemade meals, others brought in bagels from Panera or Krispy Kreme doughnuts or even Bob Evans fare. It was something we all looked forward to, and we had a fun time trying to outdo each other. What a delicious competition!
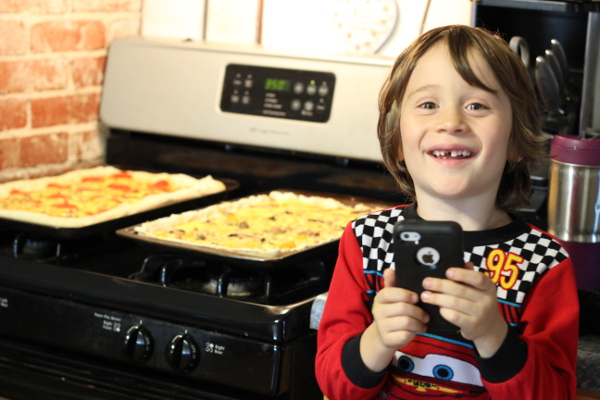
I was looking for something fun to make that no one else was bringing, so I came up with my own version of breakfast pizza. I often got up early to make it so I could bring it in fresh to work. My coworkers always asked me when it was my turn! And I always had to make an extra one for my family. Otherwise, they’d never let me leave the house!
My breakfast pizza uses the same easy-to-make dough as my regular pizza recipe. You can even make the dough ahead of time or save leftover dough from pizza night for this recipe. Just stash it in the fridge and take it out when you start prepping to bring it up to room temperature. I actually made regular and gluten free breakfast pizzas the day after I made dinner pizzas with the other halves of both doughs. All of them came out great.
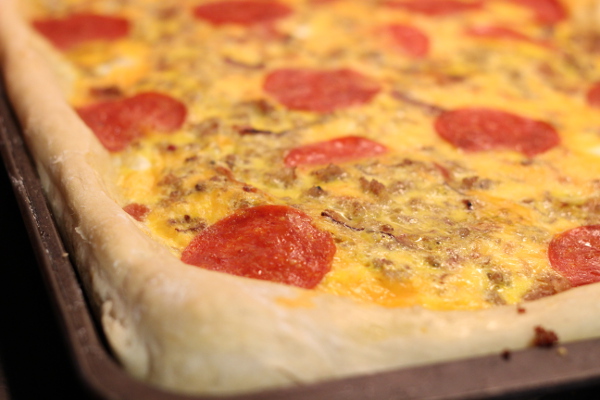
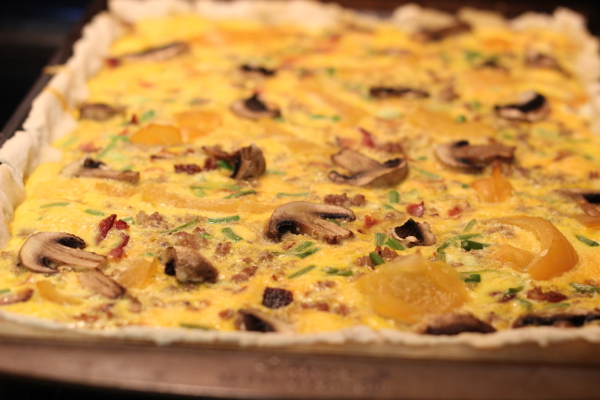
Breakfast pizzas involve a little more prep work, especially with the bacon and sausage, but it can be done ahead of time. It’s basically a glorified quiche on pizza dough. Use all your favorite toppings and ingredients from your favorite omelets, quiches, and other breakfast dishes. Use leftovers too. Mexican breakfast pizza with leftovers from taco/burrito night or a cheeseburger breakfast pizza might be really good. So might a spinach, mushroom and garlic scape one. Get creative!
Once you get past the prep, it goes together really fast. Here are my extensive prep notes for making this go together as quickly as possible. Some days I can get this all done in about 30 minutes. This time took 2 hours because I had to keep stopping for pictures and for children. Plus I had lots of “help”. But that was fine. It was a leisurely Saturday morning and we had FUN!


Prep Notes (Or click here to skip down to the recipe)
1. Preheat the oven and start the dough
I preheat the oven to 350 F for the bacon. If you’re not baking bacon, preheat to 400 for the pizza. Mix up the yeast, sugar, oil, and warm water and let foam on the stove. Let it sit while getting the bacon in. (If you are using leftover dough, just take it out of the fridge, place it on the stove and let it warm up to room temperature while you work on other things.)
2. Precook the Bacon
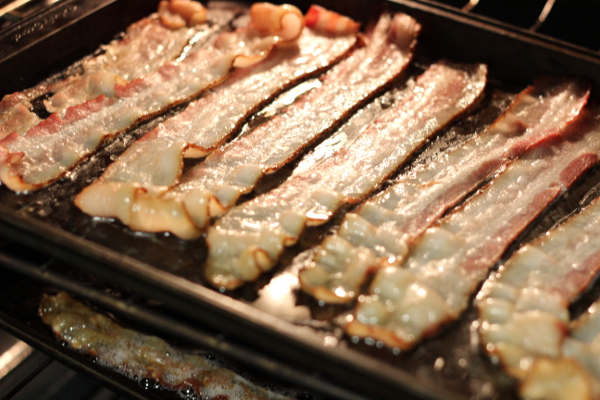
Simply arrange a pound of bacon strips on two cookie sheets. Bake at 350F for 10 minutes. Turn the pieces over with tongs and bake for about another 5 minutes or until crispy. If your oven is quirky, like mine, you might find one sheet cooks a lot faster than the other. Just swap the tray positions for the last 5 minutes for more even cooking. (Bacon shots added for my friend Bob, who thinks everything is better with bacon. He’s right.)
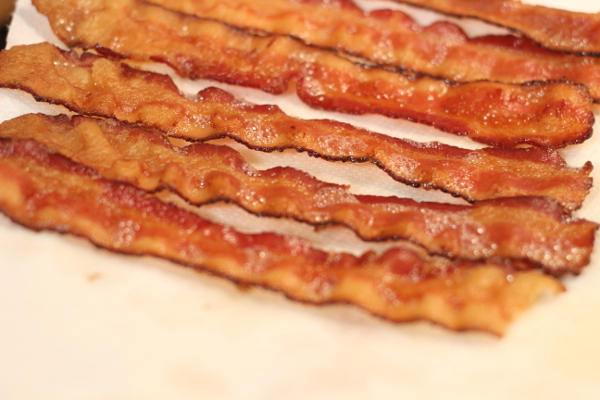
Note: I save the bacon fat for other cooking. My grandparents always did, and they’re still kicking in their 90s. If it didn’t kill them, it should be ok for me once in a while. In fact, the smell of bacon always reminds me of their house and happy memories. Bacon = happiness!
I also reuse these pans to make the pizzas in. Don’t clean all the grease off them. Just rub it in. Now the pan is pregreased and will make the breakfast pizza even more delicious!
3. Precook the sausage
While the bacon is baking, scramble up the sausage, if you’re using it. Drain fat (for later use along with bacon fat) and set aside for assembly.
4. Chop veggies
Chop up whatever toppings you’re using- onions, peppers, mushrooms, etc. Set aside for assembly. You can chop these ahead of time and refrigerate or freeze. Onions and peppers do fine in the freezer.
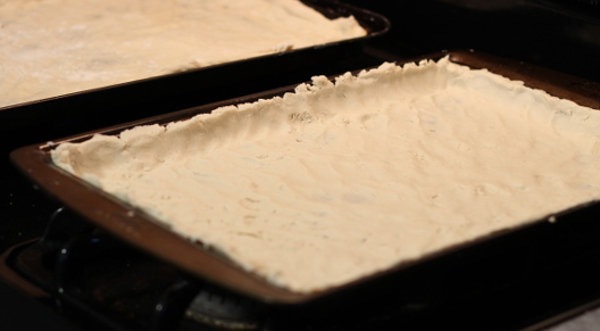
5. Shape the dough
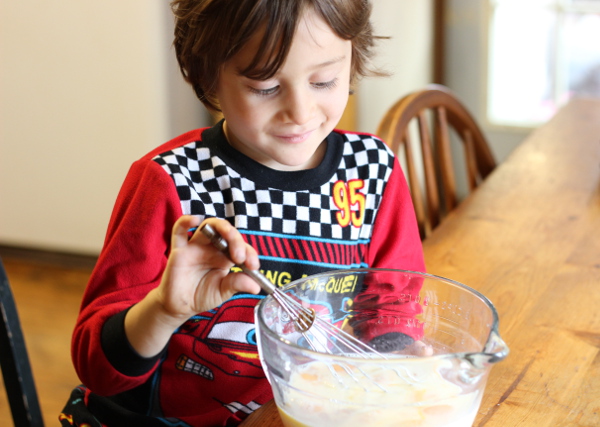
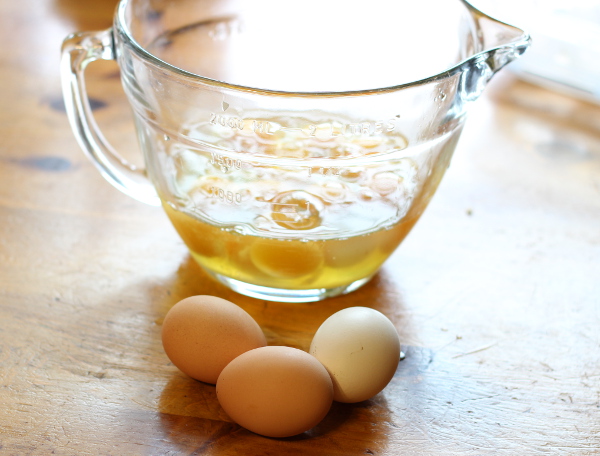
6. Prep the eggs
Assembly:
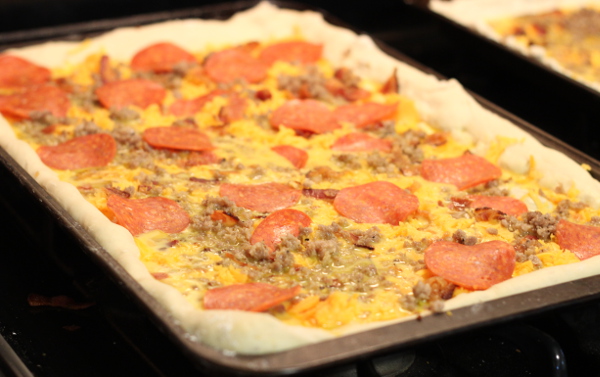
On top of the dough, add:
- 9 whisked eggs, spread over the crust like a “sauce”. Should be about 1/4 to 1/2 inch “deep”.
- shredded cheese of your choice (mozzerella, cheddar, soy, whatever)
- chopped veggies
- meats: pepperoni, sausage, bacon
- any other topping you like!

- For the crust
- 2 tbsp baking yeast
- 2 tsp sugar or honey
- 4 tbsp oil (olive or vegetable oil)
- 2 cups very warm water
- 5-6 cups of flour
- Toppings:
- 18 eggs (9 per pizza)
- ¼ cup milk
- 1 lb bacon, cooked
- ½ lb sausage, cooked
- ½ to 1 lb shredded cheese of your choice (depends on how much you like)
- chopped vegetables- onions, peppers, mushrooms, hashbrowns, etc
- any other toppings of your choice
- PREP:
- Preheat oven to 400 °F (204°C).
- Put the yeast, sugar/honey, and the oil in a very large bowl. Pour the warm water over it and stir until dissolved. Let sit in a warm place until foamy (about 5-10 minutes).
- Meanwhile, assemble the rest of your ingredients. Whisk together the 18 eggs and ¼ cup milk and set aside. Chop veggies, cook meats if needed.
- Grease 2 large round pans with oil (or use bacon fat if baking the bacon) and set aside.
- Once you have a bit of foam on the surface of your yeast mixture, it's go time! Stir 3½ cups of flour into the mixture with a large wooden spoon. The dough will be really sticky.
- Important: The goal is to add flour a little at time until it's soft, smooth and pliable; not sticky or stiff. You will learn to "feel" when it's right. So take your time adding flour. You can always add more but you can't take away. The consistency of the dough is the secret to this recipe!
- Add flour, about a half cup at a time, until the dough is soft, smooth and not sticking to the spoon. At this point, set the spoon aside and knead for a few minutes in the bowl with your hands, sprinkling more flour in to reduce the stickiness. Dough should stay soft and not be stiff.
- Pinch dough into two halves. Sprinkle a little more flour on it and turn one ball onto the pan, working it towards the edges with your hands and adding more flour in small amounts as needed. Do this again for the second pizza.
- ASSEMBLY:
- Pour half of the egg mixture over one crust and half over the other.
- Sprinkle half of the cheese on each pizza, and top with pepperoni, sausage, bacon, chopped veggies, and any other topping of your choice.
- Bake at 400 degree for 20 minutes.
- Let cool for 5 minutes and serve!


Leave a Reply